Wednesday, June 13, 2012

Working on Foot Drive Assembly:


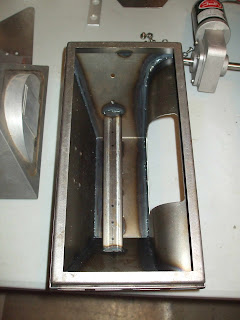
If you haven't seen a JAG motor mount up close...well, it's a thing of beauty. These babies are solid, well put together and should last a lifetime.  Jerry built these drives with a large 5" rubber drive wheel, a 2" ball caster, metal housing and a fully adjustable belt drive, geared to run on 12 volts at 78 rpm.


I started with a test fit of the mount inside a JAG steel outer foot. I then carefully marked the holes to be drilled. Once I was comfortable with the alignment of the holes, I put the foot onto my drill press and drilled small pilot holes.


These holes will later be enlarged and then countersunk to mount the drive to the foot channel.


Thursday, September 24, 2009

Front & Rear Logic Cutouts:

Trying to carry on with the momentum of cutting holes into my inner dome, I thought I'd cut out the openings for the front and rear logics. I used a diamond cut off wheel with my Dremel tool and hoped for a steady hand. Check back soon to see pictures of these openings filed and finished. Also, a quick update: My dome panels have been filed, sanded and prepped for painting and are currently out for painting. I even sprung for the proper R2 Blue mix from House of Kolor. Since my painting skills are a little lacking, I decided to use a professional. I'll post pictures as soon as I have them back.

Filing, Sanding and More Filing:

The hole left by the hole saw is a little rough...so my son, Nathaniel helped me file down the edges with a small metal file, then a coarse emery board and finally some 400 grit sandpaper. The edges are nice and smooth and ready to drill the mounting holes for the holo-projector cowling.

More Dome Work:

I decided to mount the HDP ring that comes with the 300mm dome to the inner dome. First, I drew a pencil line around the base of the inner dome at the height of the plastic ring. Then I marked drill holes every few inches in the middle of the ring. I then counter sunk all the holes with a counter sink bit and attached the ring inside the inner dome. I bought new screws since the ones supplied with the dome require a Torx screwdriver, that I didn't have, so I picked up the same size screws with a Philips head instead. Once the base ring was mounted, I got to work tracing all the panel lines onto the inner dome, using the outer dome as a template. Now came the part that had me a little nervous....cutting holes into the inner dome! I broke out my trusty 2 1/2 inch hole saw and drilled a pilot hole into the upper pie panel to create an opening for the top holo-projector.


.

Thursday, May 14, 2009

Dome Work:


I finally decided it was time to work on my 300 mm dome. Cole and Daren did a great job on these and even though they come laser cut, there is still a fair bit of cutting and de-burring of each panel. I started by labeling each panel, hopefully making reassembly easier. I cut out each panel with a small hack saw. Then used a small metal file to smooth down all the tabs left by the laser cutter. I then used a small emery board to smooth out all the edges of the panels and the corresponding cut outs on the dome. I also wanted to smooth out the spin lines left by the tooling machine, so I used my trusty mouse sander and sanded down the dome. Staring with 80 grit paper, I moved down to 120, then 220 grit. I'll finish off with medium and fine steel wool to hopefully get an even mat finish. Notice the switches I picked up from Allelectronics for use as my dome bumps. I think they look great. Not sure yet if I will actually have them control anything yet. Once the panels are all prepped, I can move on to priming and painting.


Saturday, April 26, 2008

Finally....Some Progress!!


Well, now that winter is finally over here in the Great White North that is Canada, I can finally get some priming and painting done! Here is a picture of some progress on my R2-D1 feet. These, of course, are JAG steel feet, JAG aluminum ankles and JAG aluminum battery boxes. Soon, I'll get to work on painting the JAG outer aluminum legs and Daniel's aluminum shoulder horseshoes. It is slow going but I'm starting to see some progress.

Monday, February 18, 2008

Astromech Assistant:


It's only fair to post a picture of my helper in my journey to build my own R2. This is my son Nathaniel, who is also a huge Star Wars fan. (let's face it, what choice does he have?) He is a great help and source of inspiration for me. The R2-D1 we are building is for him.